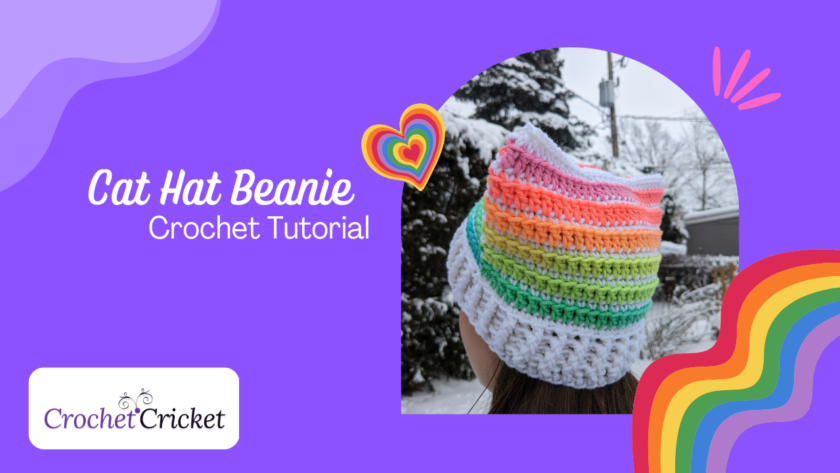
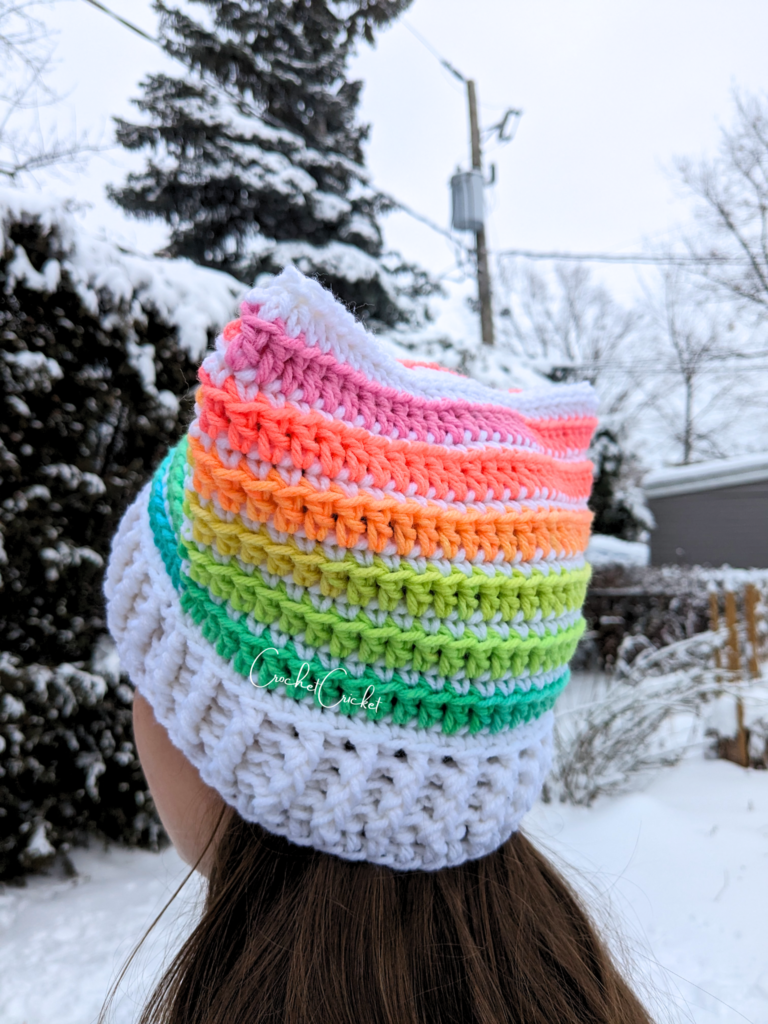
Get ready to stand out in this amazing cat hat rainbow striped beanie! Bright colors and adorable cat ears are bundled up in this quick and easy project. In this pattern you will use basic crochet skills paired with some simple techniques to create a fun addition to you or a friends wardrobe. I will take you step by step through the process so even if you have never made a hat before, you will be able to complete this project in only a few hours. So grab your hook and yarn, let’s go! Meow!!
Skill Level
This project is great for beginners who are already comfortable with basic stitches and are ready to add a few new stitches to their repertoire. If you can make a rectangle then you can make a cat hat beanie. Let’s get started!
Finished Product Measurements
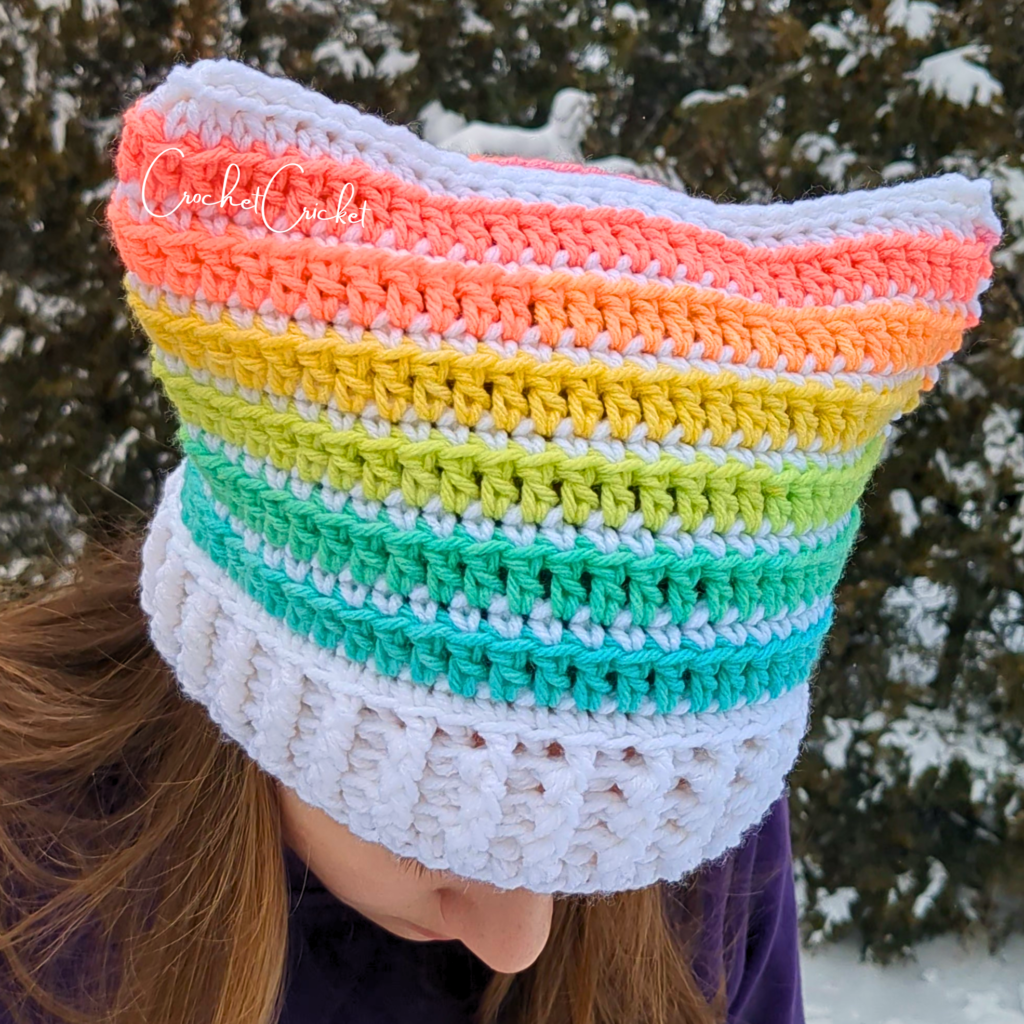
The measurements for this pattern will fit a 21″ sized head. My teenage daughter of 14 is able to wear the ones I’ve made. The final measurements for the width of the project are 10.5″ inches and 7.5″ inches for the height. The ribbing is half an inch smaller measuring 10″ inches as it synchs in slightly around the ears.
Adjusting the Size
To adjust the size of the hat just measure the circumference of your head snuggly (because you want it to fit, not be loose). This is the length of your starting chain. You can also just make a chain that fits around your head making sure that you have a multiple of 2 stitches for the pattern repeat on the brim of the hat.
Materials
Hook
5mm Aluminum Hook
Yarn
Category 4 Worsted Weight Yarn. 2 colors.
Color A – For Ribbing and sc rounds (the small stripes)
Color B – For dc rounds (the big stripes)
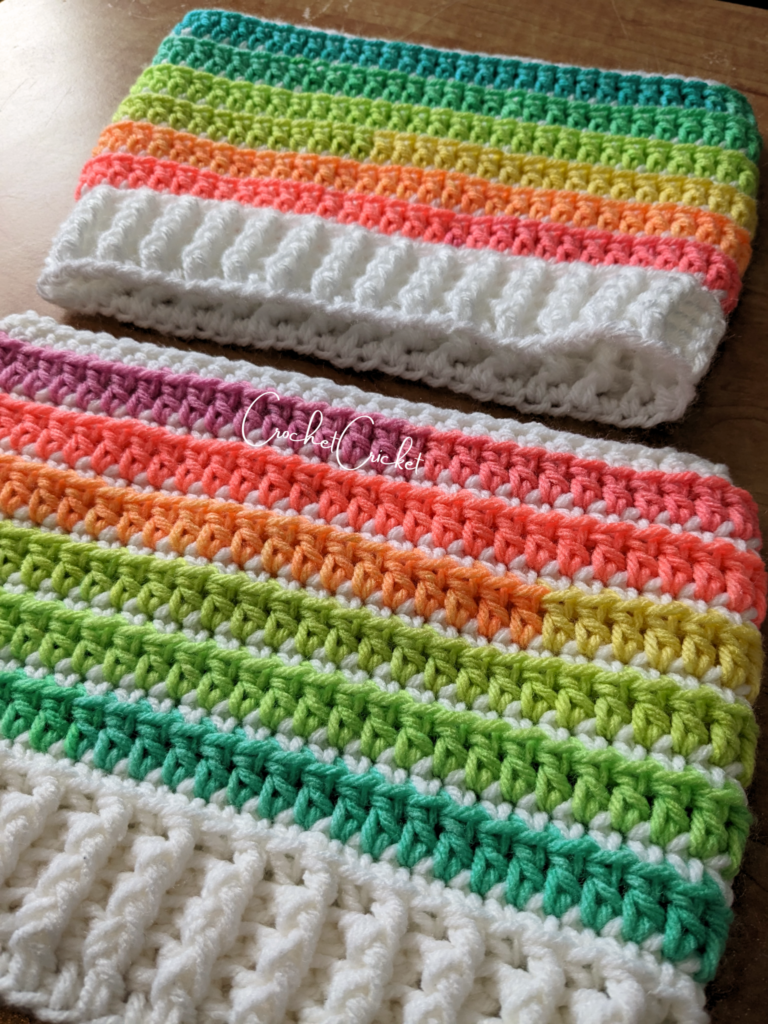
Construction Review
The construction of this hat is very basic. You will begin by creating a chain and linking that chain together so that you can work your hat in the round. We will be joining at the end of each round but we will NOT be cutting our yarn. I will teach you how to carry the yarn up with you so that you never have to cut the yarn and sew in all those pesky tails. YARN TAILS! What a nightmare they can be!! Not with this pattern. Stripes are so much more fun when you carry your yarn.
We will carry the yarn up the inside of the work. To Finish the project, we will use a flat slip stitch join. This kind of joining technique is great for joining granny squares, seaming garments etc. We will use this technique to close up the top of our beanie. But don’t worry, I will show you step by step how to do this join. If you are still not comfortable joining this way after the tutorial, you can turn your hat inside out and seem from the inside with a single crochet as an alternative method.
Once you have finished the top of the hat and sewn in your tails, you will find that you have two pointed cat ears, one at each side of the top of the beanie. ADORABLE, I know right!!
Stitches
st(s) – stitch(s)
sp – space
rep– repeat
ch– chain stitch
sl st – slip stitch
sc – single crochet
dc – double crochet
fpdc – front post double crochet
bpdc – back post double crochet
**Special Stitchs – sc blo + 3rd bar and also hdc + 3rd bar** (see video tutorial)
Pattern Repeat
Multiple of 2 Stitches for Ribbing
Staring Chain
Chain 60 (or as many chains as you need see adjusting the size above)
sl st to join – you now have a large loop
Brim Ribbing
We will now work in rounds from the brim to the top of the hat. Work the brim with color A.
Round 1 – ch2 (counts as dc for brim rounds), work 1 dc into each st around. Join into top of staring ch 2.
Round 2 – ch2. This ch2 Counts as bpdc. Work fpdc around 2nd st. Work bpdc around 3rd st. Alternate fpdc and bpdc around each stitch around. Work fpdc around last st. Join into top of starting chain. (60 sts)
Round 3 and 4 – rep round 2
Body of the Hat
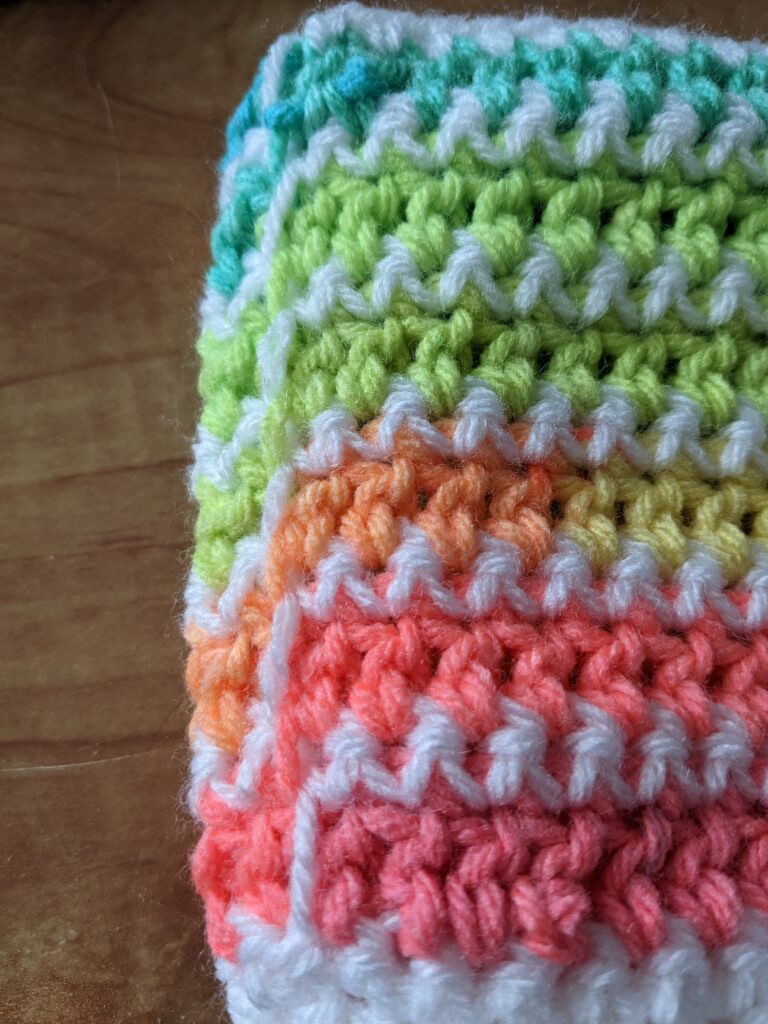
Round 5 – (color A) ch1 (no longer counts as a stitch), sc blo + 3rd bar in each stitch around. Join into first real stitch ignoring the ch1. (60 sts)
Round 6 – (color B) Now you have a color change. Do not cut your working yarn. Drop color a and pick up color B. Pull the new color through the loop on your hook. Pinch the tail in place, then pull tightly on color A, so it becomes less visible. Ch1 with color B. Refer to video tutorial for more detailed instructions. Dc in each st around including the st that you just joined into. At the end of round, join into top of first stitch ignoring the ch1. (60 sts)
Round 7 to 17 – Rep rounds 5 and 6. You should have 6 sc blo + 3rd bar rounds and 6 colorful stripes.
Round 18 – ch1, change to color A, work hdc blo + 3rd bar into each st around. Do Not Join.
Finishing Seam
Great job! You are almost finished with your Cat Hat Rainbow Beanie!! You just need to sew up the top of the hat. I use a technique for this called a flat slip stitch join. This is a method of joining that is popular with joining granny squares and its a great way to make a beautiful seam on the right side of your work. I have explained how to do this in the video tutorial and here is a shorter version of that tutorial on my TIKTOK
Video Tutorial
Share Your Work with our Community
I really hope that you have enjoyed making this project!
I would love to see your work. Tag me!
Facebook – @crochetcircket
https://www.facebook.com/crochetcricket.ca
Instagram – @crochetcricket
https://www.instagram.com/crochetcricket.ca/
Hashtag your work – #crochetcricket
Be sure to let me know how you enjoyed this tutorial and what other content you would like to see posted on my channels in the future. Remember to like, comment and subscribe if you like what you see!
Enjoy !